It occurred to me today, when I mentioned about the current state of the Scampington Signal cabin, that there was a thread about the building of it somewhere. However, try as I might, I cannot find it on here. So, I shall have another go...
Anyway, about 3 years ago I was given a
Jackson's Miniatures kit by that very nice Ian Sharples (where is he these days?) as a swap for making him an armchair for his own signalbox...
JM kits are pretty basic - an MDF box comprising four bits of wall and two bits of roof with plastic windows and doors. I decided that the small size of this particular building was suggestive of a bucolic, indeed ramshackle ship-lap timber signal cabin – which fitted the character of my own line perfectly.
Assembling the kit itself is of course very straight-forward. The only thing worth mentioning here is that I deliberately did not fit the window- and door frames as of course the outside would need to be clad with something approximating to ship-lap planking first. I also took the precaution of coating the assembly with a thinned fence-panel preserver, to further protect the MDF from the elements.
So, what to use for this cladding? Well, as luck would have it I had recently been given some sheets of thin wood veneer, the kind that one would use for parquetry or marquetry if only one were skilled enough.
These sheets of veneer make very realistic G-Scale wood cladding! However, I made a point of not cutting it with a craft knife, but instead made small nicks in the edge of the sheet and carefully snapped strips off. The edges of the resultant strips were irregular, having snapped along the grain – thus enhancing the natural, rustic look. Each strip was about a half-inch wide. Here's the result of the application of the cladding to the sides, and indeed some roofing felt to the roof – found from another raid on the back of my garage. The external corners of the cabin, which protect the edges of the cladding, are made from coffee stirrers. Note that the windows are still not yet glued in; painting this building would be much easier with no windows or doors getting in the way:

The problem with wood, of course, is that unless properly treated, it will eventually rot away; wood veneer is no exception. With that in mind, I decided that several more coats of thinned fence-panel preserver would be needed.
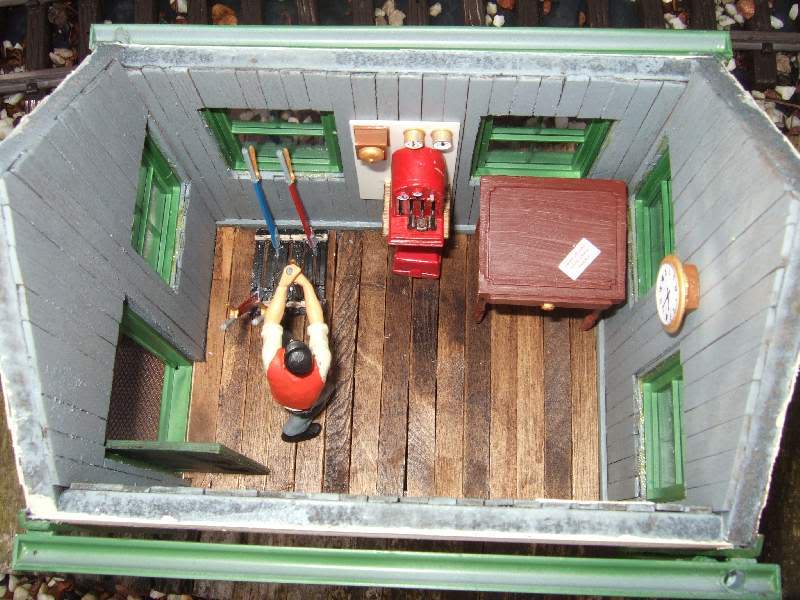
Once that was done, it occurred to me that I did have rather a lot of coffee stirrers standing idle. I looked at the interior of the cabin, which was looking a bit bare and rather reminiscent of… well, MDF really. I decided to clad the interior with those hitherto-unemployed coffee stirrers to simulate ‘tongue-and-groove’ boarding:

I had also been experimenting with adding a simple, battery-powered interior light to the building, mounted in the roof space. That meant of course that the roof had to be removable, but at the same time not easily removable by gusts of wind. To that end, I fitted barge-boards to the ends of the roof, made from ice-lolly sticks:

The interior, now clad with its own wall-boarding, started me thinking about further interior detailing. I ordered a signal box interior detailing kit from Steve Warrington at
Back-2-Bay-6, and immediately realised I would have a problem – I would need to fit a floor inside the cabin. This in turn meant I would need to mount the building on some sort of plinth. Fortunately, the plinth came about fairly easily, courtesy of some wooden battens covered with Milliput and scribed to indicate simple brickwork. The internal floor was then made from yet more ice-lolly sticks, laid across the top of the plinth. The exterior was then painted with acrylic paints to further enhance the water-resistance of the wood. The windows and door were fixed; the ‘glazing’ was courtesy of some clear plastic from an old blister-pack. I avoided using the stuff provided in the kit, as it was a bit too thick for my liking.

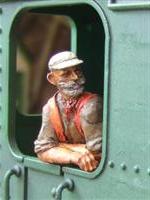
With the roof removed, one can then see the interior, with the floorboards (waterproofed of course) and the interior detailing kit. The newly-appointed signalman is a Preiser figure, whose previous career involved track maintenance.
Yet more embellishments were then added to the exterior; some guttering and down-pipes made from Plastruct mouldings and drinking straws respectively, while the spares box was raided for a set of steps from an old ‘Pola’ kit:

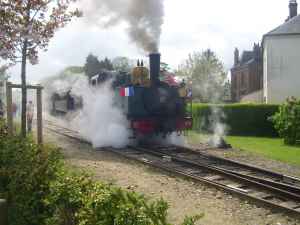
I then took a deep breath and let it loose in the garden permanently; hoping and praying that all my efforts at waterproofing and preserving would not be in vain. Three months later, having endured a depressingly typical British spring/summer, the results were actually quite pleasing. Yes there was a lot of muck about, but it served to enhance the look I was seeking – a run-down rickety old signal cabin:

Hopefully I will get an opportunity soon to take a more up-to-date pic.